What is Microsoft Producer 2003?
Well, simply put, Microsoft Producer 2003 is the latest version of the popular add-in for Microsoft Office PowerPoint 2003, and your way to produce online media rich fully interactive engaging presentations.
Offering an array of tools that make it easy to create, edit, synchronize, and publish rich-media presentations that can be viewed anytime in a users Internet browser, Microsoft Producer has grown since its early and primitive release to provide a platform for presenters to develop and deliver engaging presentations, training, and business communications.
As a creator of presentations, you have no doubt been frustrated time and time again by the apparent "boundaries" of PowerPoint. Boundaries that seem to limit creativity and overall use of the PowerPoint application. Well, with Producer 2003 you are now able to further push those boundaries, with the ability to:
- Capture live audio or video using any capture device that is supported by Microsoft DirectShow.
- Include compelling transitions and video effects.
- Embed presentations in HTML iFrames for greater layout control.
And as an executive or presenter, you are now able to:
- Develop on-demand training content that engages users and complies with eLearning standards.
- Generate high-quality online presentations.
- Produce on-demand executive broadcasts.
- Use Producer 2003 to capture and archive meetings.
- Mobilize and index archived videotapes and training material.
If all this sounds far too good to be true, then follow this tutorial, and see if Producer 2003 is what you have beens waiting for to add that extra edge to your presentation.

|
Let's get started |
So, now we know what Producer is able to do and assist you with in your presentation and media library, let's get started.
Microsoft Producer 2003 is free for all registered users of Microsoft Office PowerPoint 2003 and 2002.
To download Producer 2003 and follow this tutorial, click here.
In this first of my three part tutorial, we'll be looking at how you can use Producer 2003, to capture, import, and organize your media elements for browser and online broadcasts.

|
Application Interface |
After downloading and installing Producer 2003 click Microsoft Producer for PowerPoint 2003, from the Microsoft Windows Start menu to open the application.
When Producer 2003 opens it has a very similar feel to PowerPoint. At the top of the screen we have our File main menu, and beneath this 3 main areas entitled Media, Table of Contents, and Preview Presentation. In this tutorial we will focus on Media.
If the Media button is not active by default, press the button.
|
|
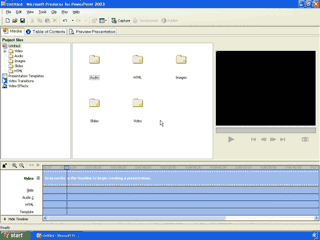 |
Producer 2003 application interface.
|
 |
To the left of the screen are your Project files and media folders, Video, Audio, Images, Slides, HTML for your presentation.
The Presentation templates, Video Transitions, and Video Effect options that you also assign to your presentation are listed here in there reelvant folder categories.
To the center of the screen is your file browser, whilst to the right a Media Player preview window is enabled to preview your sound, video, and media files for importing.
At the bottom of the screen, your presentation timeline, keyframes, and events are displayed showing all actions, and events within your presentation.
|
Importing Audio |
In order to begin creating our presentation, let us first begin by gathering an assortment of media files that we wish to use within our online broadcast.
Using audio within your presentation can be very useful either as a narration, or as a soundtrack.
To import an existing audio file, double click on the Audio folder. The center pane now updates to show any audio files already inserted into your project, as well as an Import Audio icon.
|
|
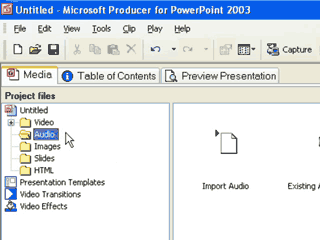 |
Screenshot of the center pane after
double clicking the Audio folder
|

|
To import your existing audio file, double click the Import Audio icon to launch the standard windows dialog box and browse for the audio file that you wish to import and press Open.
Alternatively select Import from the File menu. This also launches the standard windows dialog box to enable you to choose the audio that you wish to import.
|
|
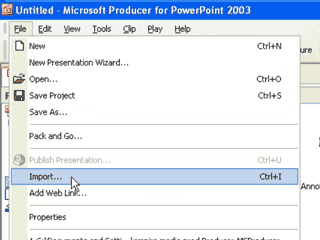 |
Alternatively, select Import from the File menu
to import your existing sounds into the project
|

|
Importing Video |
Video content is perhaps one of the most compelling aspects of any presentation. Producer 2003, allows you to either import your existing video clips and files, or to capture your own.
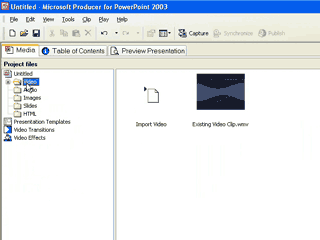
To import your existing video file or files, double click on the video folder in the tree pane on the left side of the screen. The center pane now updates to show any video files already inserted into your project, as well as an Import Video icon.
|
|
 |
The chart layout and active Datasheet
|
 |
Double click the Import Video icon, and browse for the video file that you wish to import and press Open.
And as with the audio option, you may alternatively select Import from the File menu. This also launches the standard windows dialog box to enable you to browse and choose the video file that you wish to import.
|
 |
Adding Images, Slides, and HTML |
As you may have already discovered if you imported video and audio so far, adding images, slides, and HTML is done in a similar fashion.
To add images simply double click on the Images folder in the tree pane on the left of the screen. To add PowerPoint slides double click on the Slides folder. Or to add HTML, double click on the HTML folder.
|
|
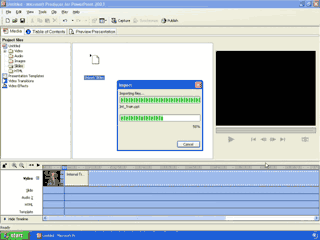 |
Importing a PowerPoint presentation into your project
|
 |
As with the audio and video options, you can also choose Import from the File menu to browse, select, and open the relevant media type that you would like to import for your project.
|
|
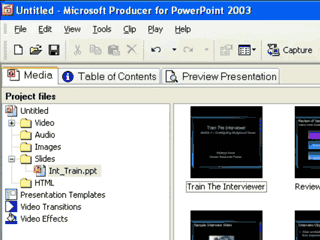 |
PowerPoint slides are displayed in the window pane
from your imported presentation.
|
 |
Capturing Video, Audio, Images, and other screen content |
The Capture Wizard enables you to capture screen and audio content. As an example of using the Capture Wizard, we will add audio narration to a PowerPoint presentation, whilst simultaneously synchronising the audio to the slide transitions.
Sound complicated?
...the real joy or Producer 2003, is that to achieve results such as these, it's actually more difficult to describe than it is to produce them!
Firstly, Import your presentation following the outline above under Adding Images, Slides, and HTML.
Once you have imported your slides, click their icon in the center pane, and whilst holding down your mouse button drag them onto the timeline at the bottom of the screen and release your mouse.
|
|
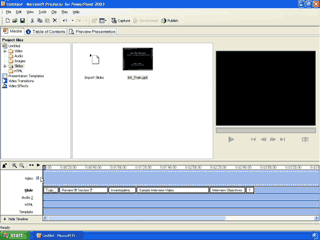 |
After dragging your PowerPoint presentation onto the timeline.
The titles of each of your slides is displayed horizontally
across the timeline category Slide
|
 |
With your slides now placed on the timeline, click the Capture icon from the menu.
|
|
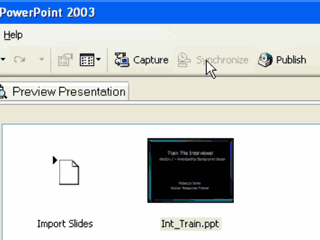 |
Click on the Capture icon
to enable the various capture options.
|
 |
The Capture Wizard dialog box opens.
Select Narrate slides with audio then click Next.
menu.
|
|
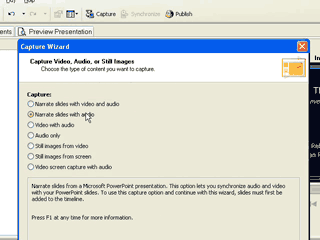 |
Select Narrate slides with audio.
|
 |
In the Audio Capture Setting dialog box.
Specify the Target Audience connection speed. Choosing between Dial-ip modem, DSL, and larger bandwidth speeds.
Remember the higher the connection speed the greater quality can be given to the audio narration track, but try to be realistic about the Internet bandwidth of your audience.
Under Windows Media technology, select Windows Media 9 codecs to enable the best quality regardless of user bandwidth or connection.
|
|
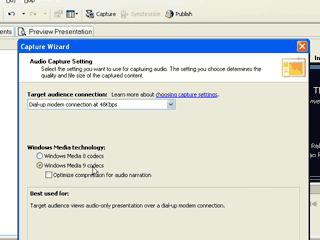 |
Select Bit rate and Windows Media Player 9 codecs.
|
 |
Click Next to move to the Capture Device dialog window.
Select the Audio device, and Input source, choosing Mic/ Line if you wish to narrate your slides using your microphone, and adjust the Input level slider to find a comfortable sound level with no distortion.
|
|
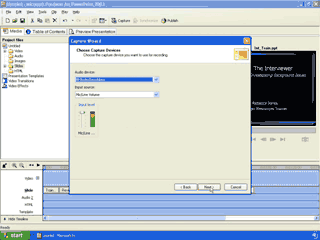 |
Select Audio device and Input source.
|
 |
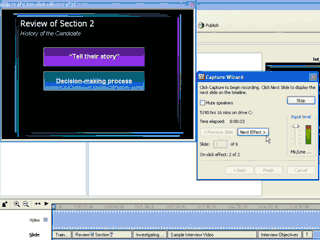
Click Next, two floating windows are now present on screen, with your presentation slides in one, and the audio capture dialog in the other.
When you are ready, click Capture in the audio capture dialog window to begin narrating your slide presentation.
|
|
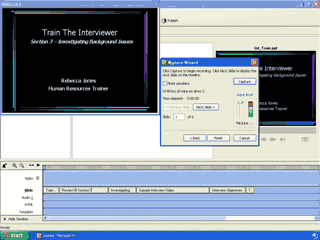 |
Narrating your slides.
|
 |
Click the Next Slide button to automatically advance the slides to automatically synchronize your narration with the slide flips throughout your presentation.
If your slides also include animated slide effects, the Next Slide button turns to Next Effect, to enable you to also automatically synchronize your narration with the timing of any slide effects that you have placed within your presentation.
After the final effect animation on the slide, the button will change back to Next Slide, enabling you to continue you through to your next slides.
|
|
 |
Continue to click Next Slide.
|
 |
When you have completed your narration, click Stop.
Click the Save button, and give your narration file a name in order to save the file.
After file is saved, click the Finish button to close the audio capture dialog box and return to your project.
The Preview Presentation tab is now selected, and your presentation available for previewing in the center pane. To preview your project use the play controls in the right hand pane.
|
|
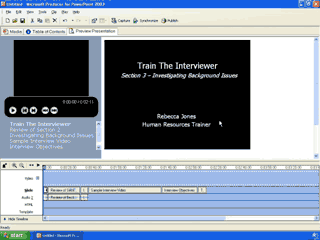 |
After your narration is complete
preview your narrated presented in the Preview pane.
|
 |
In Part 2 of the Producer 2003 tutorial |
Now that you are able to import and capture all media types and files for our projects, we will look towards the video aspects of Producer 2003 and the options that it provides your presentation in, Part 2 Producer 2003: Video, learning how to:
- Add video effects to a video clip.
- Add video transition effects between two video clips.
- Synchronize audio and video with slides and images.
Before finally putting everything together and completing our Producer 2003 tutorial series in Part 3 Producer 2003: Presenting, where we will learn how to:
-
Choose a Producer 2003 presentation template.
- Preview a Producer 2003 presentation before publishing it.
- Publish a Producer 2003 presentation to a local drive or network share.
- Publish a Producer 2003 presentation to a Web server, or combination Web server and media server.
All in all Producer 2003 is a comprehensive package that will enable you to achieve more than you have been able to purely with PowerPoint in the past.
And in the next part of this tutorial we'll unlock the power of video, and video effects that Producer 2003 has to offer you, to create greater impact in your media deliveries, e-learning, and corporate presentations.
Scott Harvey, Managing Director The Impossible Media Group
|