Publish your Presentation to your computer or the Network
Once you have reviewed and are satisfied with your presentation, you can publish it to a variety of locations, and/ or media, for example, a local drive, a network share, CD, or website.
To begin publishing your presentation, click Publish in the Icon menu.
|
|
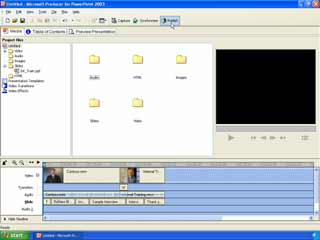 |
Click Publish to begin the Publish Wizard
|
 |
After clicking Publish, the Publish Wizard will give you the choice of publishing to My Computer, My Network Places, and Web Server.
|
|
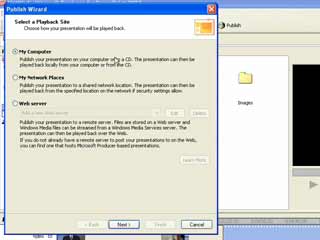 |
The Publishing Wizard
|
|
The process of publishing to My Computer, or My Network Places is identical.
To publish to either your local drive, or network share, select either the My Computer, or My Network Places radio button, and click Next.
the Publish Wizard now prompts you to name your presentation and specify the location of where to save.
You can either type in the location to save your presentation in the path or choose the Browse button to browse your local drives and folder structure.
|
|
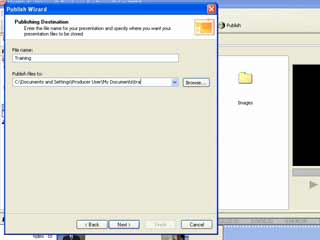 |
Naming your presentation and save location
|
|
Once you have named your presentation and chosen the location to save, click Next.
The Publish Wizard now prompts you for Presentation Information, including a title for your presentation.
In addition the Publish Wizard prompts you for the presenter, as well as the opportunity to specify an introduction page picture, such as your company logo, or a picture of the presenter that will appear to viewers upon opening the presentation.
The final field of the page, allows you to add a description of the presentation as an aid to viewers of the presentation.
|
|
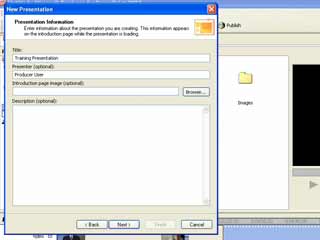 |
Adding Presentation Information
|
|
Once all of the fields are completed, click Next.
The last step of the publishing process is selecting the publish settings that best match the needs of your audience.
The default option is to Use the suggestive settings (recommended).
Producer evaluates the video and audio content on the timeline in terms of codecs and bit rates used and recommends the best publishing settings.
|
|
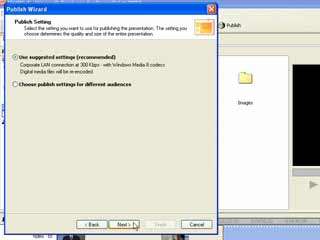 |
Using the suggestive publish settings (recommended)
|
|
As an alternative to using the suggestive publish settings, Producer also allows you to choose publish settings for different audiences and specify the settings yourself.
To specify settings rather than use the recommended, select the Choose publish settings for different audiences radio button.
|
|
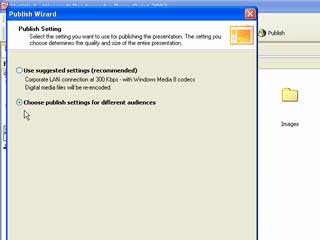 |
Choose publish settings for different audiences
for greater publishing control
|
|
On the Custom Publish Settings Page, first choose which codec, or codecs you wish to use from the Windows Media technology drop down.
Select Windows Media 9 codecs, for the best quality at any bit rate, unless you have a specific requirement for other codecs.
Using Windows Media 9 codecs, also enables you to use rich-media streaming, and optimize the audio compression for voice narration by ticking the appropriate boxes.
Rich-media streaming is designed to enable you to stream your presentation over a network from a Windows Media server allowing users to view the presentation immediately upon clicking the file rather than having to download your presentation to their local drive before being able to open and view the presentation.
Whilst ticking the Optimize compression for audio narration, enables Producer to use the Windows Media 9 voice codec, providing the best voice play back especially at low data rates.
Beneath Target audience connection, specify the preferred target audience connection speed. If you decide to select multiple bit rates, Producer will create one presentation with multiple bit rate versions of your presentation and allow the user to select from the options available to the viewer beneath the play text on the introduction page, enabling the user to select the best presentation for the best experience.
|
|
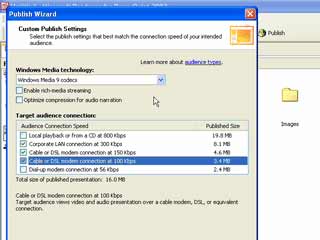 |
Selecting codecs and bit rates for your presentation
|
|
Once you have completed, and selected all the fields and checkboxes that you require, click Next.
If you wish to see the files that Producer will publish to create your presentation, click List Files to be Published.
|
|
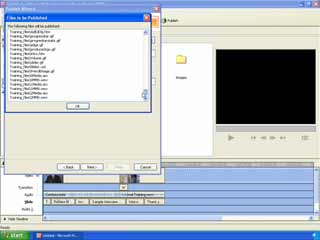 |
Viewing the Producer creation files
|
|
| Now simply click Finish to complete the process.
|
|
Click here to continue to the final page of this tutorial and learn How to Publish to Web and Media Servers.
|
