Removing anti-aliased edges
To remove anti-aliased edges, we need to edit the Alpha Channel properties of the graphic in a graphic application such as Adobe PhotoShop, or Paint Shop Pro.
For the purposes of this tutorial we shall use Adobe's PhotoShop to illustrate, although users of Paint Shop Pro will recognize that menus and icons are almost identical.
Open the graphic you wish to import into your presentation in PhotoShop.
|
|
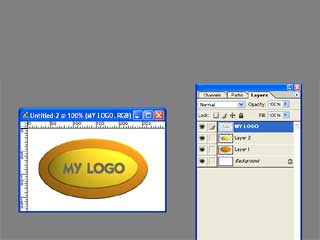 |
Opening your graphic in PhotoShop
before importing to PowerPoint
|
 |
When your graphic is loaded, check the Layers palette to see if the graphic has been saved with layers previously.
Layers are segments of the image placed on top of each other, enabling parts to be "turned on" or off, to composite a final image.
If the graphic is composed of layers
Simply select the background layer and drag this to the wastebin icon at the bottom of the Layers palette dialog box.
|
|
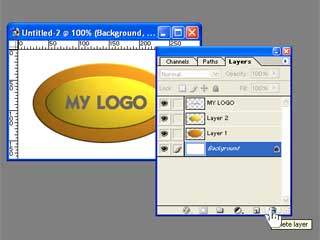 |
Deleting the background of a layered graphic
|
|
With our background deleted, a Checkerboard pattern should now be visible behind the graphic, illustrating that the graphic has no background.
|
|
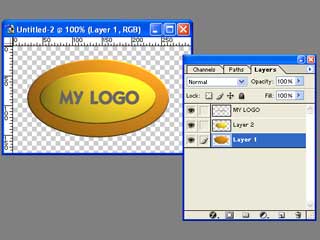 |
The graphic is now transparent
|
|
Now save the graphic in .PNG format. Not JPG, TIFF, or BMP, as you might be used to, but in PNG format. Do not flatten, or otherwise Merge your layers. Simply save your graphic using the Save As... file command from the File menu.
PNG, is an acronym for Portable Network Graphics, and is a standard format that retains a graphic's Alpha Channel settings, (transparency settings).
Now that the layered background was deleted, the graphic has a 0% Alpha Channel setting around its edges, which enables PowerPoint to create a perfect anti-aliased edge around the graphic and the background of your presentation when you import the PNG file into your presentation.
|
|
 |
The newly saved PNG graphic imported into PowerPoint
has smooth anti-aliased edges that perfectly match the
background of your presentation
|
|
If the graphic is not composed of layersWhen you load your graphic in PhotoShop, or other image editor, if the graphic is not in layers but is instead "flattened". You must attempt to manually remove the background from the image to achieve a transparent 0% Alpha Channel background.
|
|
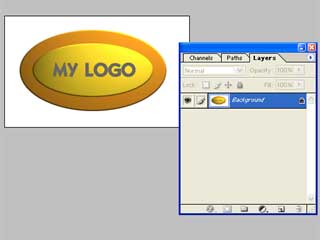 |
A flattened graphic with no transparency
|
|
To select the white background of the graphic, select the Magic Wand tool from the Tools palette.
|
|
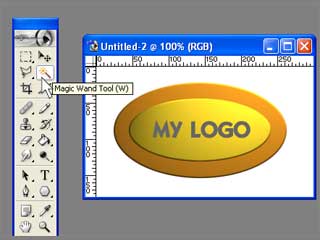 |
Selecting the Magic Wand tool
|
|
With the Magic Wand tool selected, set the tolerance setting of the tool to 1, and ensure that the anti-alias option is turned on.
|
|
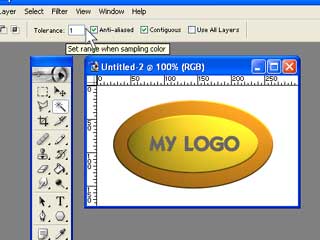 |
Adjust the selection properties of the Magic Wand tool
|
|
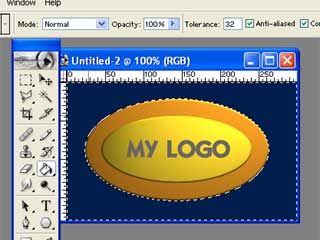
With the Magic Wand tool still selected, click upon the white background. This selects the white background, and also an anti-aliased edge around the graphic.
With the background selected you need to fill the white color with a similar color to the background of your presentation. In this example it is blue.
But the backround is an image of several blue shades and variances, but how do you decide which blue value to use as the background color?
The blue needs to match the most prominant shade of blue in the presentation background.
If your background was a gradiented blue running from dark to light blue, you would select a blue shade around the mid range.
In our example, we can see the blue is a deep shade. But how do we determine which shade?
Guessing an approxiamtion of the shade will produce very good if not near perfect results. But if you wish to find the exact blue, do a screen grab of your presentation using the Print Screen key and paste this image into PhotoShop and use the Eyedropper tool to find the precise value, automatically replacing the foregound color so that you may now use the fill function to fill the white background with the appropriate blue.
To fill the area with the blue foreground color, select Edit from the File menu, and select Fill from the following pulldown menu.
|
|
 |
The dominant blue of the presentation background
is now used to fill and replace the
white background of the graphic
|
|
Now flatten the graphic if it contains several layers, and save the graphic in .PNG format using the Save As... file command from the File menu.
Now that the background is approximately the same value as the dominant color of your presentation background, the anti-aliased edge around the graphic will match the presentation background, and the "artifacts" or rough edges will be much smoother using the PowerPoint Transparency tool.
Import your newly saved PNG graphic into PowerPoint and repeat the steps from page one of this tutorial. Right clicking the image to load the Image toolbar.
Select the PowerPoint Transparency tool and select the background blue of the imported graphic.
|
|
|
The newly saved PNG graphic imported into PowerPoint
has much smoother anti-aliased edges than simply
using the PowerPoint Transparency tool alone.
|
|
To conclude... |
Achieving transparency on bitmap images within PowerPoint is not as difficult as many may lead you to believe.
On bitmap images that do not have layers, and the background is itself a part of the graphic, as is the exmaple given on this page, some experimentation may well be needed with the Magic Want tool in PhotoShop, or your preferred graphics editor application, to achieve a suitable anti-alias selection around the graphic image.
Whilst I would always recommend starting with an anti-alias tolerance value of 1. You may well require a setting of 2 or 3. Likewise, finding the appropriate background fill color in your graphics editor application, may also require a little experimentation if you are not prepared to do a screen dump (use the Print Screen function key) to import a still of your presentation into PhotoShop for color analysis and use of the Eyedropper tool.
But with very little experimentation, you'll quickly see that the results when complimented with PowerPoint's own Transparency tool are very effective, and greatly rewarding.
Of course, in a perfect world, every graphic would be produced in layers, and we would simply need to delete the background layer and save the image in PNG format to import a perfect 0% Alpha Channel graphic into PowerPoint. But whilst the world is still not yet perfect, we can always rely on our ability to manipulate flattened graphics for use within our presentations, and achieve the highest possible visual results for our audience and viewers.
Scott Harvey, Managing Director The Impossible Media Group
|
